Hey Y'all, Charlie here again. It's too cold and nasty to be outside working on another project, so football and blogging it is. (Yea, I'm not too upset about that). Remember the Chalkboard and wine shelf project? Well, here are step by step instructions on how you can build your own.....
If you caught the post Flea Market Dreams, Emily said how I surprised her with a chalkboard for Christmas. She also mentioned how we saw a large chalkboard at the flea market in Nashville. But, she did not mention the look on her face when she saw it. I knew instantly that I would be making a better chalkboard for her as a Christmas Gift. As she talked to the gentleman who was selling it I played it off as it was to big, we didn't have enough room in the truck, anything I could to get her away from it. As soon as we got back from our trip I began thinking of how I would make a better Chalkboard. I began with some research on how chalkboard paint worked on different materials. I soon learned that magnetic paint and chalkboard paint DO NOT work together. I made a trip to Lowe's and the journey began...
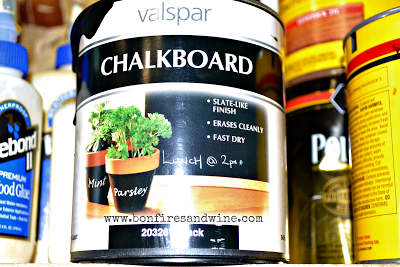
So, like every other guy I could not believe what someone else told me and had to try the magnetic paint and chalkboard paint for myself. I chose two different chalkboard paints and found that Valspar brand seemed to cover the best. Also, what I read on the Internet about magnetic paint and chalkboard paint proved true. Magnetic paint alone does not have a strong hold even with a very powerful magnet. Once the chalkboard paint is applied it cancels all magnetic paint power out.

So......being bull headed I still wanted to find a way for my chalkboard to be magnetic. I started in the heating/cooling aisle and found a piece of flat sheet metal. It came in a 2ft x 2ft sheet at $9 a sheet. My first thought was to buy two sheets and put a divider board in the middle connecting them, making two separate chalkboards. I wasn't sold on that idea and went to the metal aisle. I found flat metal that came in 2ft x 4ft size for $25. This was perfect. It's a little stronger than sheet metal and I wouldn't have to divide the boards.
Once I got home I prepped the metal for paint. I used a grinder with a wire wheel to help speed the process. Be careful when roughing the surface, you just want to give the paint something to bond to. I applied 4 coats of paint to the metal. I'm pretty sure 2 coats would have worked but the more the better right? While the metal was drying I started building the frame. Remember our DIY Photo Frame? Follow those same steps to make your chalkboard frame. Make sure you make the frame slightly larger than the metal.
I attached the metal to the frame with an air staple, (most air nailers will accept staples.) The staples will puncture through the metal better than a nail and also provides a better hold into the wood. Once I completed the chalkboard, I couldn't wait till Christmas to give it to Emily, so she got an early present. Let's just say the look on her face was better than when she saw the one in Nashville. (Insert self pat on the back!!!) As soon as I brought the chalkboard in, Emily began searching for the perfect spot. Soon I found us moving some decorations and a small hutch to make room for our new design. Once the chalkboard was hung, it needed something else to go with it. Guess what???? I'm headed back out to the garage to start another project.........
We decided that our chalkboard needed something else to go with it....Wine of course. So, project Wine Shelf officially began.
I had some 90 degree brackets in the garage. These brackets need to be strong enough to hold a good amount of weight. (We have a lot of wine). I used a stud finder and located the studs, then attached the brackets every 16 inches.
Using a left over 1x6x8 I placed it on top of the brackets. I attached the board to the bracket from underneath using 3/4 inch metal mesh screws. If you don't have these, I recommend getting them. They are coarse thread and have excellent grip for such a short screw.
With the same material as the chalkboard I cut sides to meet flush with the base board and attached them with an air nailer.
I attached a board to the front and nailed to it the base and side boards. Once this was complete I turned it over to my lovely wife and her decorating talents and this was the finished project......


Now that my job is done I get to sit back and drink some wine, but not for long. Em & I are finishing up our striped hallway gallery wall. Make sure you stop back by to check it out. I've also got some ideas for a couple projects that she doesn't know about so it should get real interesting around here in the next couple weeks. Now back to some football :)
~Charlie
Linking up!....


